Working with Projects
This document demonstrates how to create a project on AutoML platform.
In this article:
What is Project?
"Project" is the basic unit of organization in the Qeexo AutoML system. A Project represents a collection of work to solve a specific machine learning problem on a particular target hardware. Hardware examples include “Arduino Nano 33 BLE” sense module, “Arduino Nano 33 IoT” sense module, “Arduino Nicla Sense ME” sense module, “STMicro STWin” sense module, and “STMicro SensorTile.box” sense module etc,.
You have to install AT LEAST one hardware (sensor module) to be able to create a project (UNLESS you are creating a project for Arm Virtual Hardware which requires no physical hardware). Please click the link for hardware installation guide. You will find installation guide for specific sensors.
An example of a Project might be something like "Turbine-Predictive-Maintenance", where the data, models, and tests are compiled with the end goal of using machine learning for predictive maintenance on Arduino Nano 33 BLE devices attached to turbines.
Creating and Managing Project
To help you better understand the guide, we are presenting a demo project - “Demo-ArduinoNano33BLE” - to demonstrates every step. Please follow the IN DEMO CASE sign along articles.
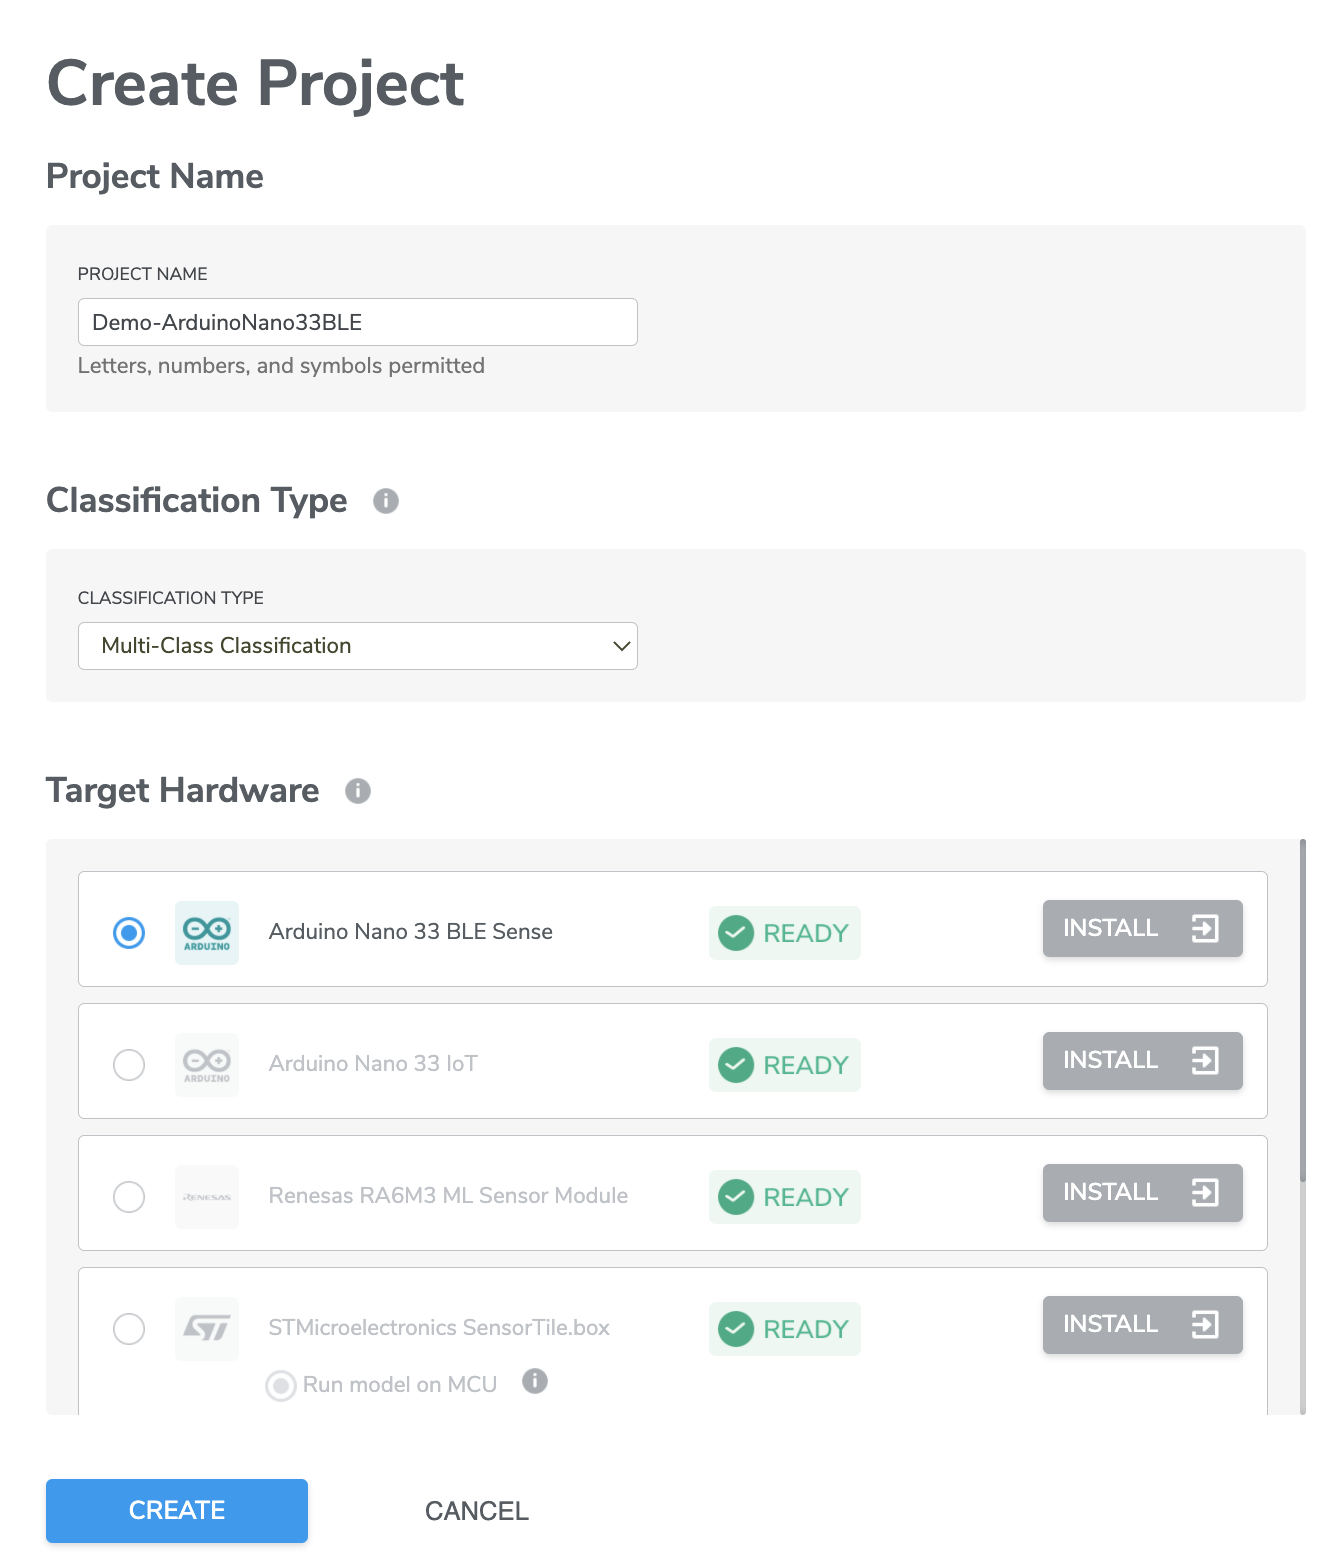
1. As a new user, you will be taken to the “Create Project” page after logging in, where you can specify a Project Name, Classification Type, and the Target Hardware.
a. Project Name: Enter a name that is reflective of the purpose of your project.
IN DEMO CASE we name it as “Demo-ArduinoNano33BLE” since we are using Arduino Nano 33 BLE hardware. Please refer main Arduino Nano 33 BLE Installation Guide for installation before creating project.
b. Classification Type: Choose between “Single-Class Anomaly Classification”, “Multi-Class Classification” and “Multi-Class Anomaly Classification”. This refers to the type of machine learning prediction type you want to use.
- Single-Class Anomaly Classification is suitable for identifying whether or not a data point belongs to the given class (for example, tap or non-tap);
- Multi-Class Classification can be used for applications distinguishing two or more classes (for example, tap, wipe or still).
- Multi-Class Anomaly Classification is the combination of Single-class and Multi-class classification where the model can distinguish the training classes as well as predict 'unknown' if the new datapoint is sufficiently different from any of the training classes.
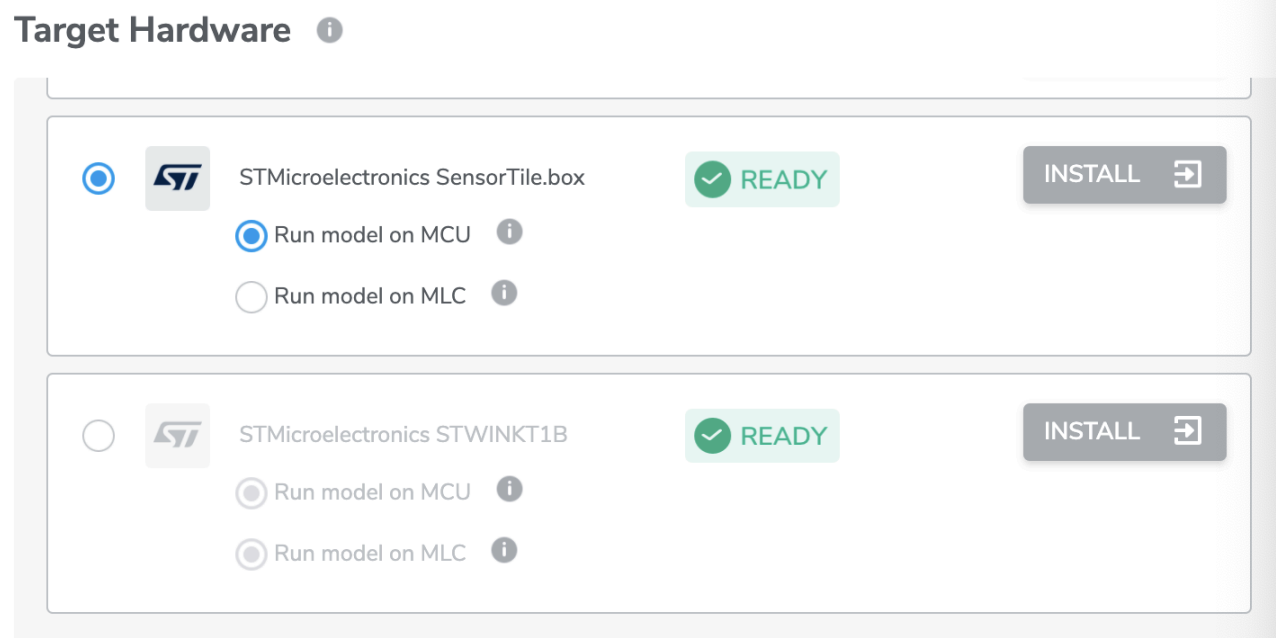
Note, if you are building a project with STMicroelectronic STWIN or STMicroelectronics SensorTile.box sensor module, and select MLC as sub-project type, “Multi-Class Classification” is the only supported classification type (Refer Target Hardware in next bullet point for more information).
IN DEMO CASE we select “Multi-Class Classification”.
c. Target Hardware: Select the hardware that will be used in your project. There are multiple hardwares that AutoML support, and you can find installation guide from the link. Note, you must have install the hardware before creating projects.
IN DEMO CASE we select “Arduino Nano 3 BLE Sense”.
*Note, for STMicroelectronics SensorTile.box and STMicroelectronic STWINKT1, there are additional sub-project types: users can select whether the machine learning model runs on the Micro-Controller (MCU) or the Machine Learning Core (MLC). MLC allows running model on MEM sensor which enables consistent reduction of power consumption.
2. After the selection, click CREATE button to create you project.
.png?inst-v=0e115e88-76f5-42af-928f-0447b1a69911)
Now you have successfully created your first project!
Additional
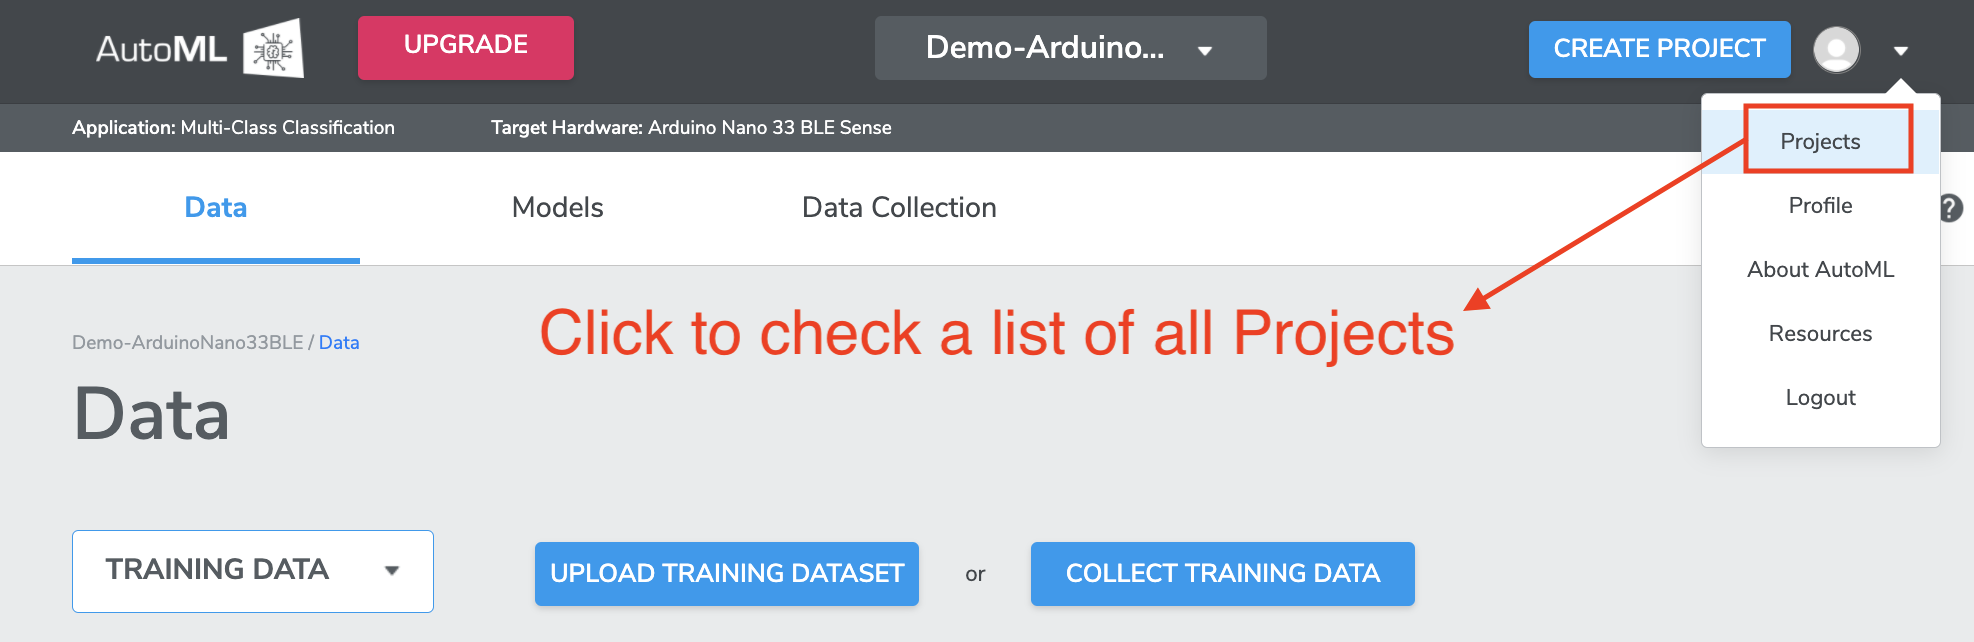
A list of all Projects created from your account can be found on the Projects page, which can be found from the drop-down menu of the User Profile icon at top-right corner.
Additional Projects can be created by clicking the
CREATE PROJECTbutton on the Projects page or at the top-right corner.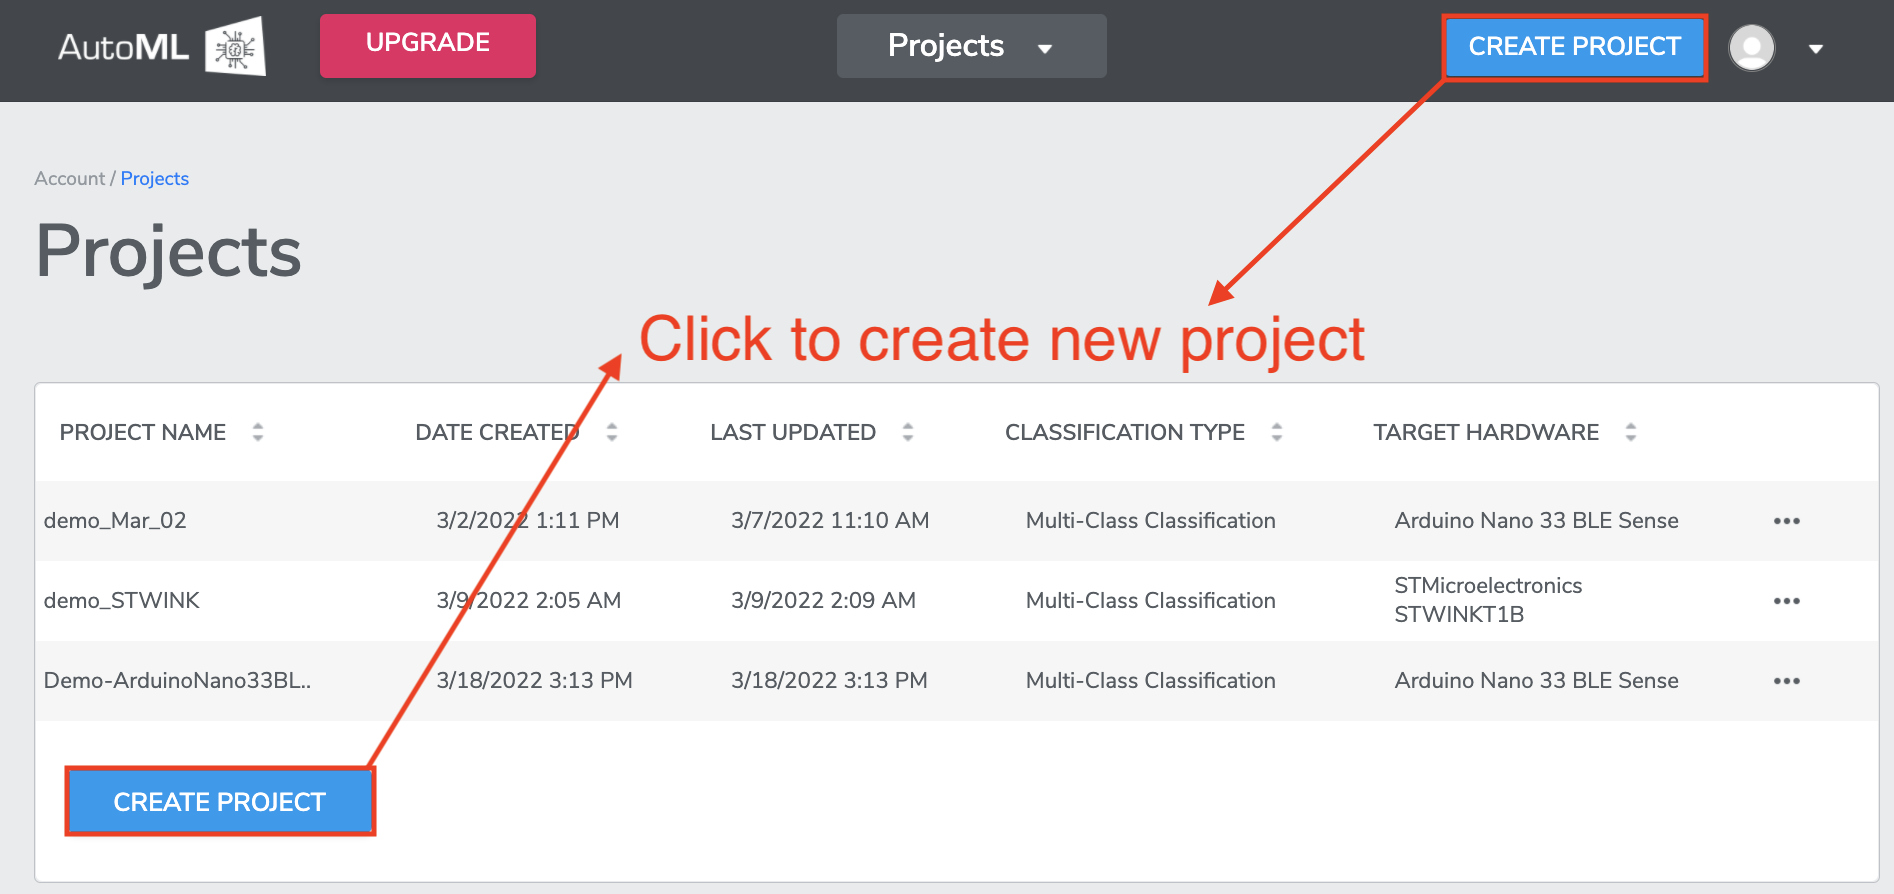
You may
Deletethe Project orEditthe Project Name from the...icon to the right of each Project.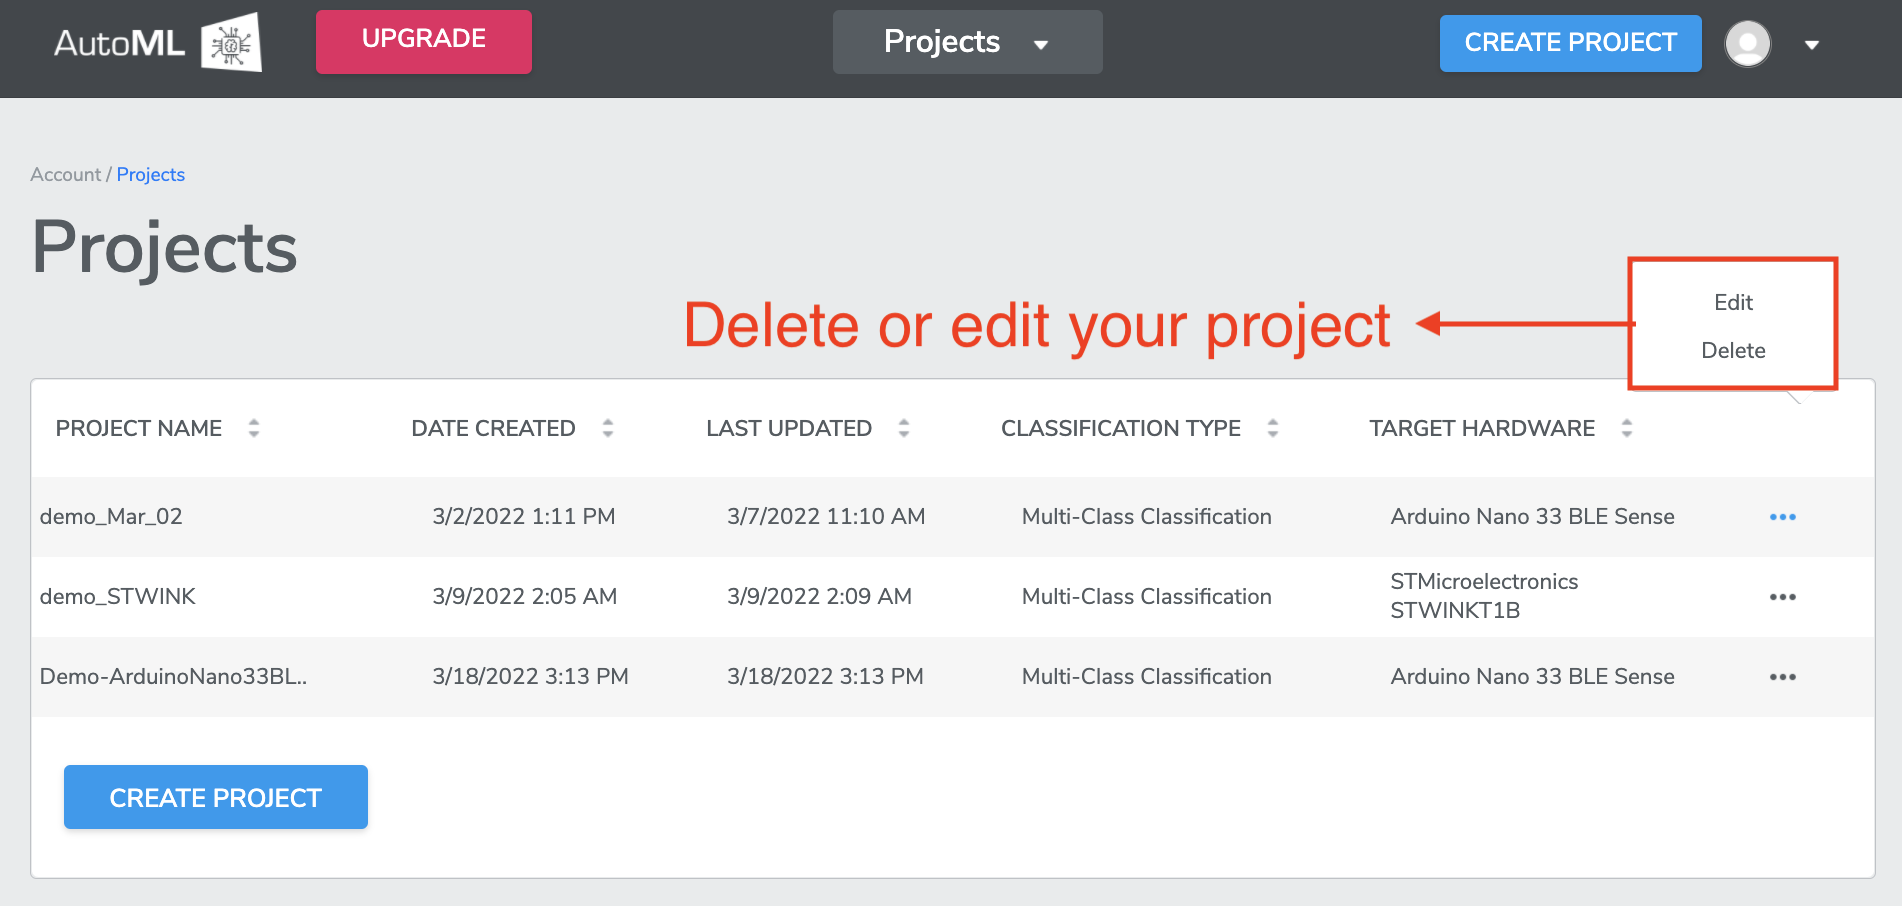
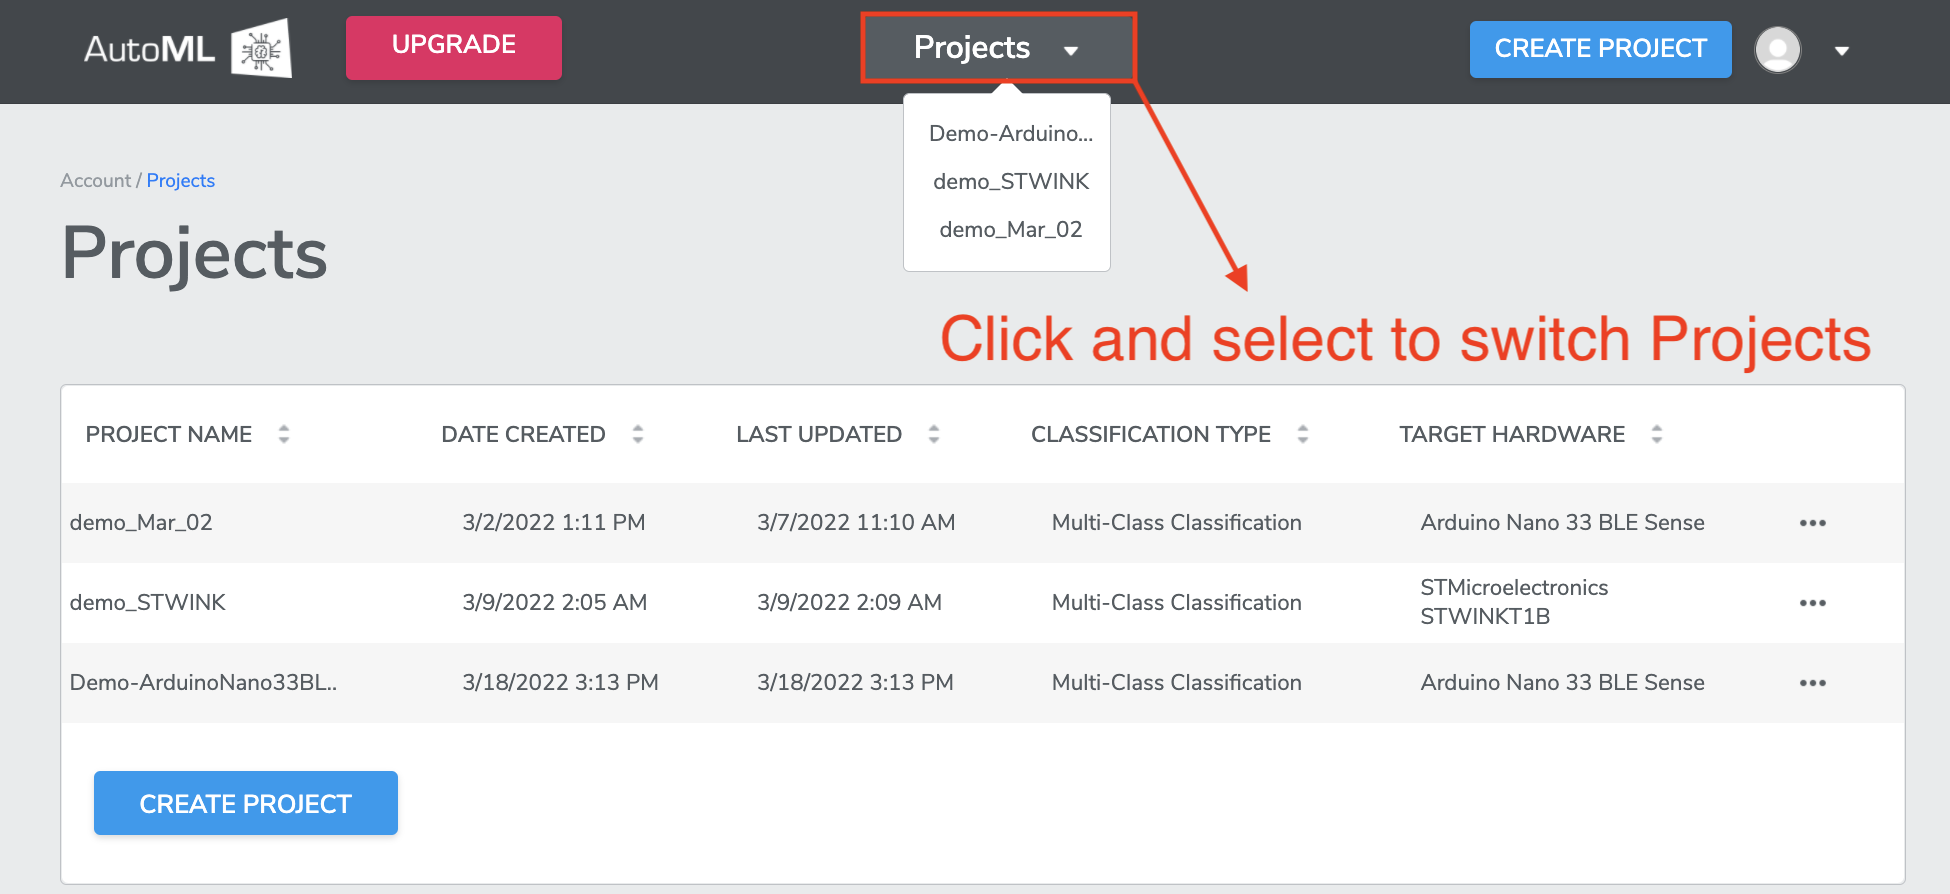
You may also switch Projects by clicking the
Projectsbutton at the top center, then select the project you want to switch from the drop down menu.