
STMicro STWIN Installation Guide
This document demonstrations how to install STMicro STWin Sense to MacOS and Windows Operation System.
In this article:
Download and install Qeexo AutoML on MacOS
Setup STMicro STWIN Sense on MacOS
Download and install Qeexo AutoML on Windows
Setup STMicro STWIN Sense on Windows
APPLIES TO:
Tested on macOS BigSur and Windows 10 Build 2004 Version 19041.630
Installation on MacOS
Prerequisites
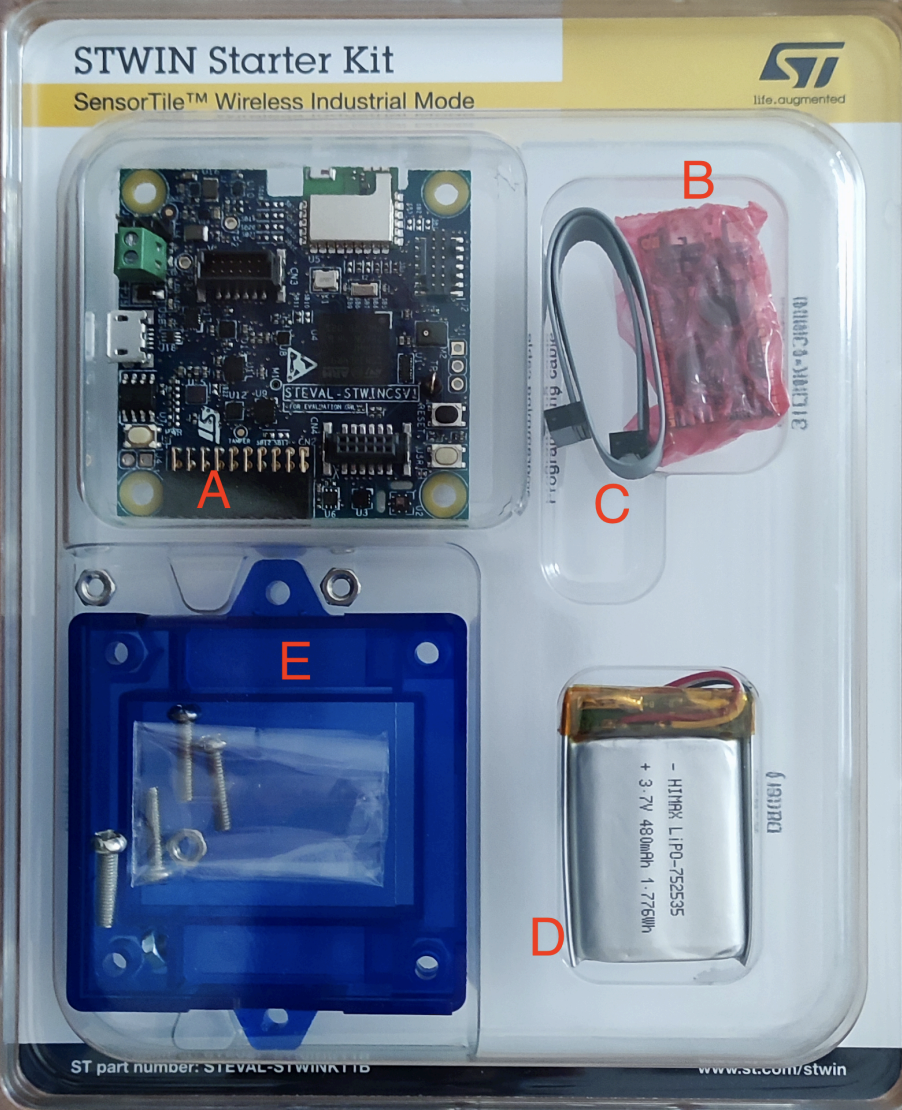
STWIN Starter Kit with the following components:
STWINKT1B (A)
STLINK-V3MINI (B)
Programming cable (14-pin) (C)
Battery (D)
Blue plastic case and four pairs of screws and nuts (E)
A micro-USB cable to connect the sensor module to your laptop
Download and install Qeexo AutoML on MacOS
If you have previously downloaded and installed Qeexo AutoML application on your laptop, and it is the most updated version, please skip this section and jump to Setup STMicro STWIN Sense on MacOS section.
Please keep your Qeexo AutoML application up to date as Qeexo periodically release software updates to fix bugs, improve performance, or add features. You can either Update Qeexo AutoML Software automatically or manually.
Qeexo AutoML DOES NOT currently support Apple Silicon devices including Apple M1 / Apple M2 processors. Although you are free to bypass it, please do so AT YOUR OWN RISK, as some feature may not perform as expected and may lead to kernel panic to the device. Known Apple Silicon based issues can be found in the Qeexo AutoML’s release note.
We encourage you to reach out to [email protected] to report any issues you have encountered.
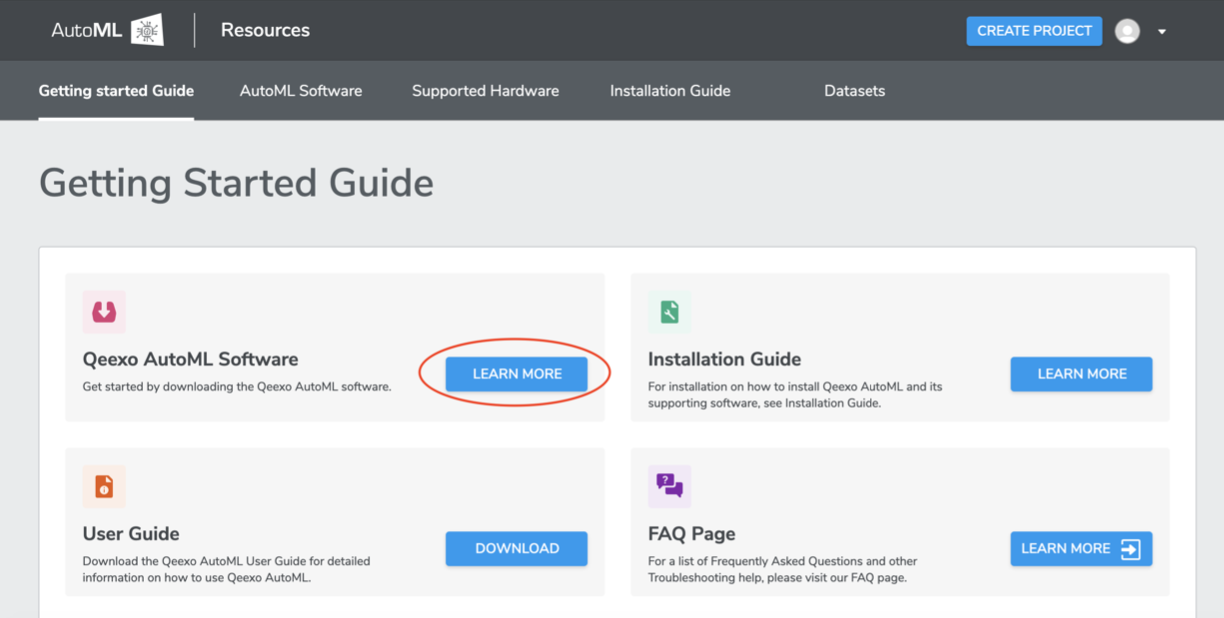
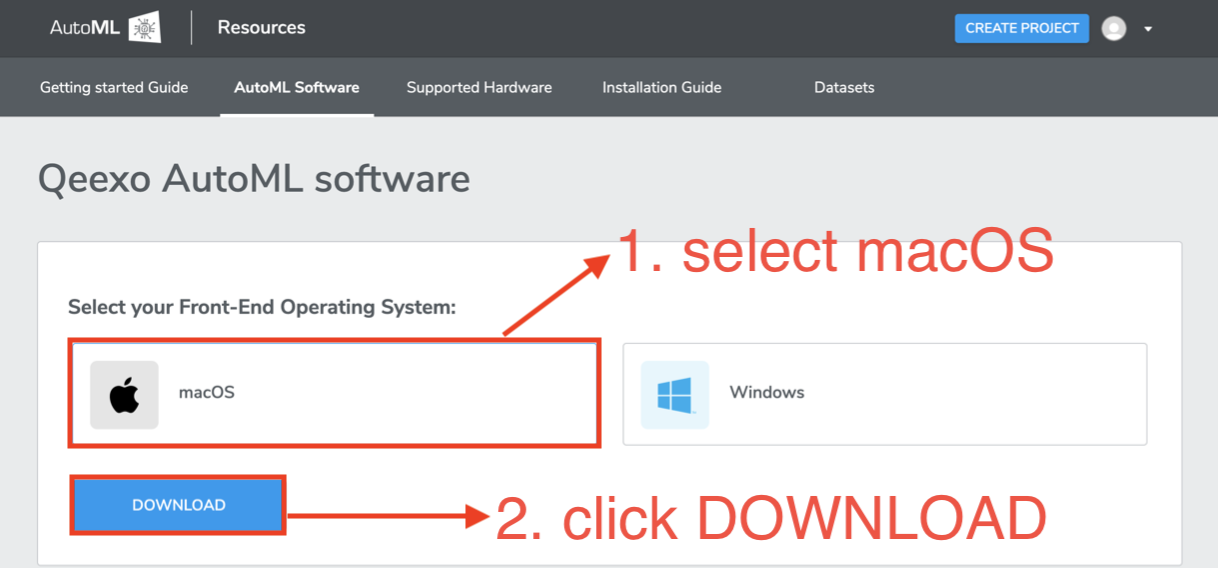
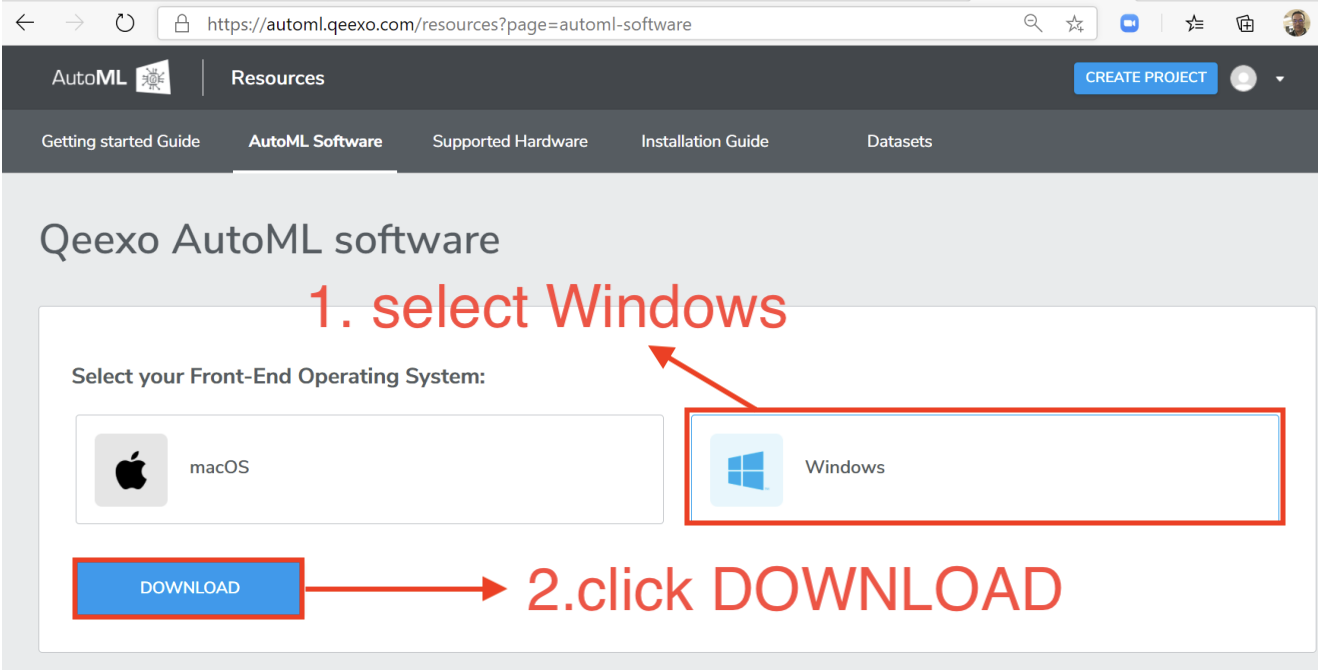
1. Once you registered and logged into your Qeexo AutoML account through https://qeexo.com/ , Please visit this link, select Qeexo AutoML Software, then select macOS to download the latest installer.
2. Once the installer - QeexoAutoML-installer-macOS.pkg - is downloaded, double-click it to install it.

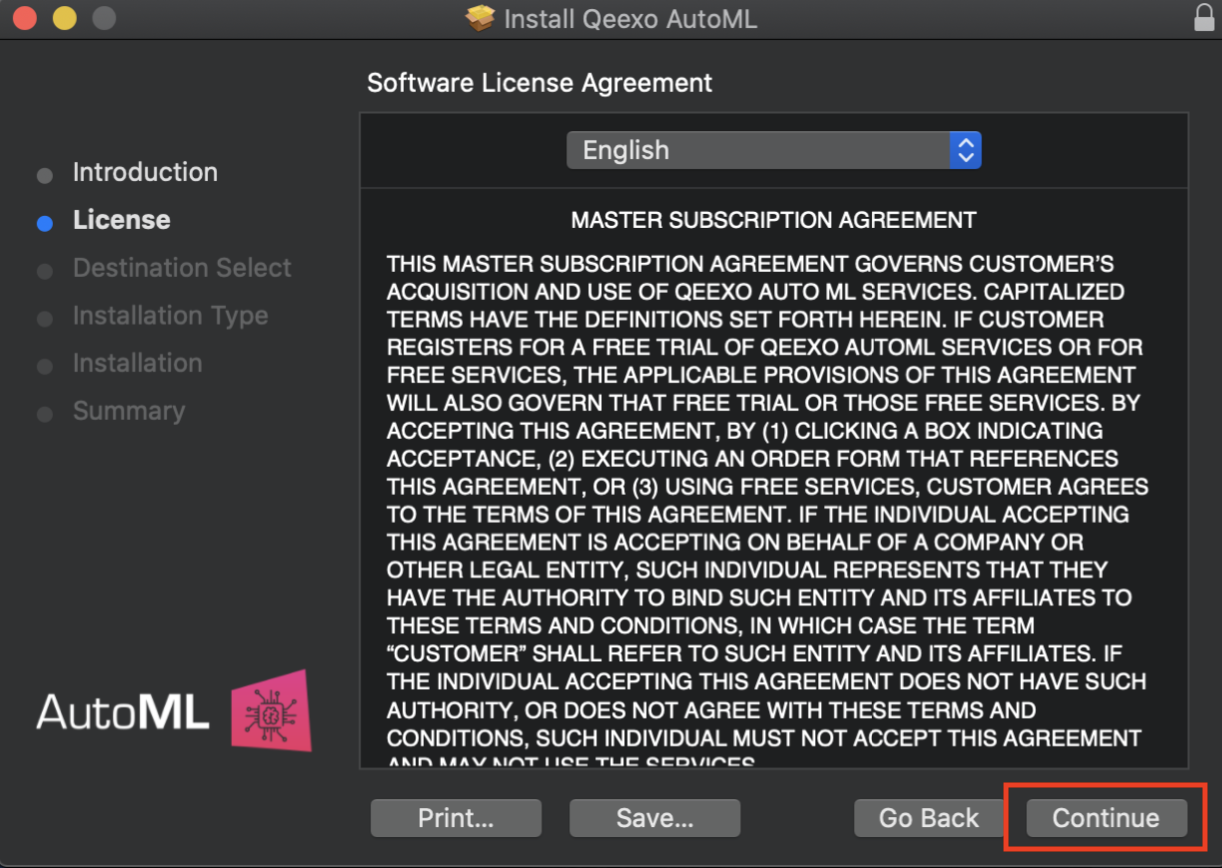
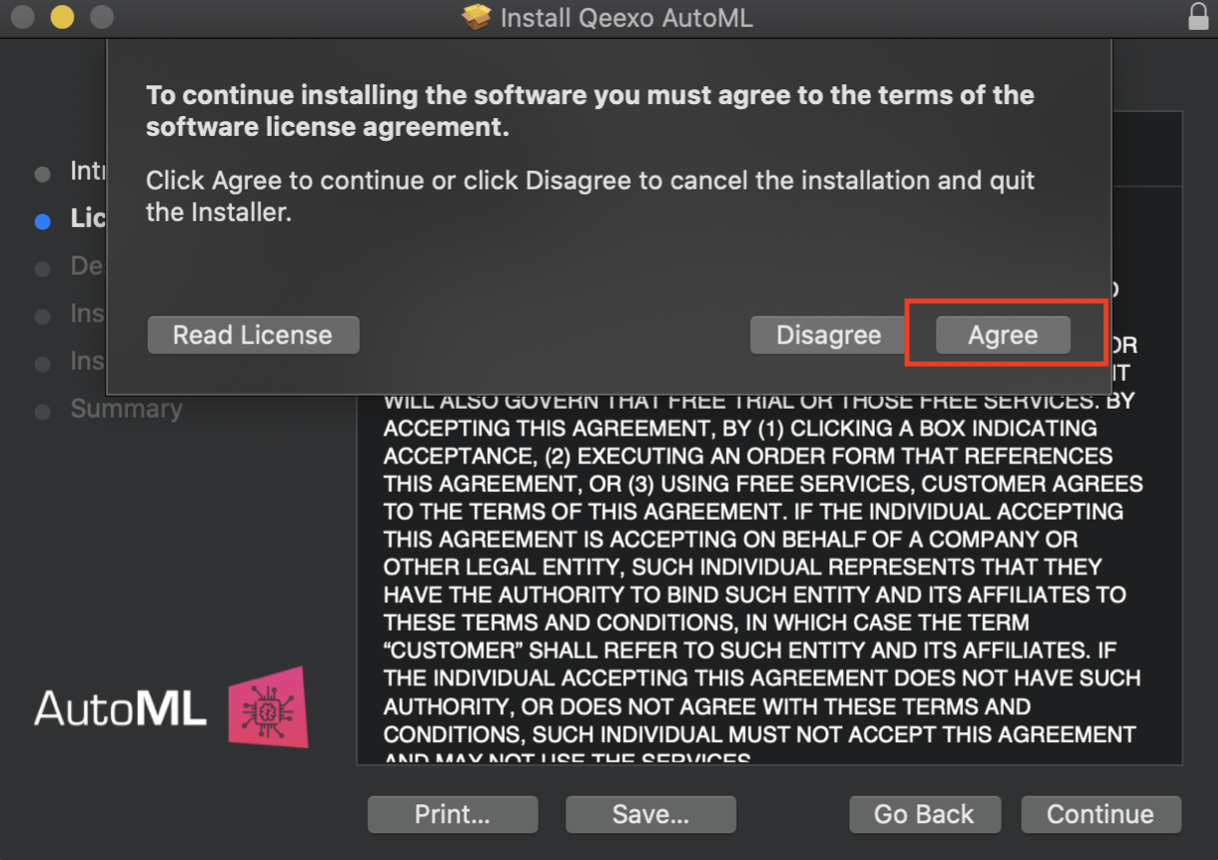
3. Click Continue, then read and click Agree on the license agreement to continue installing.
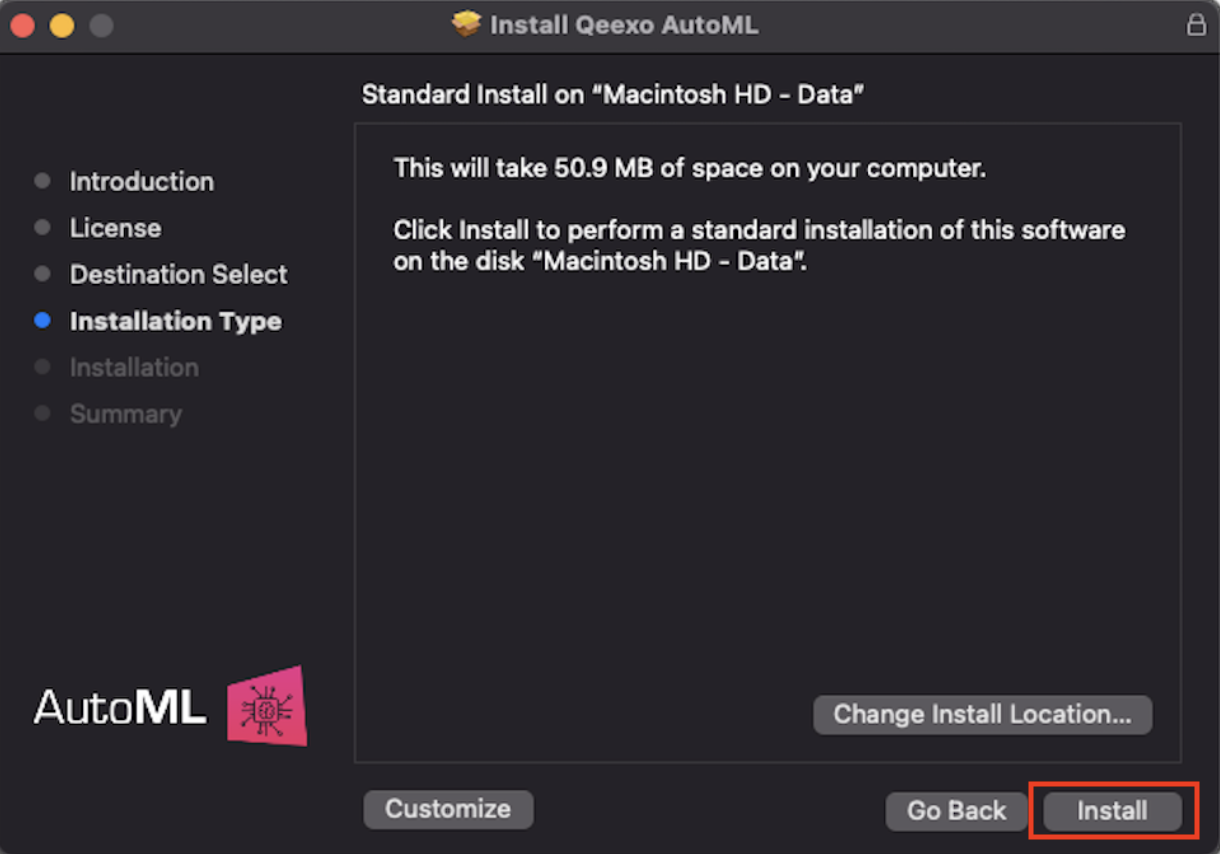
4. Leave the destination as default and click Install to continue installing.
*When prompted, enter the system password (or Touch ID, if applicable) to allow the installation of the new software on your laptop.
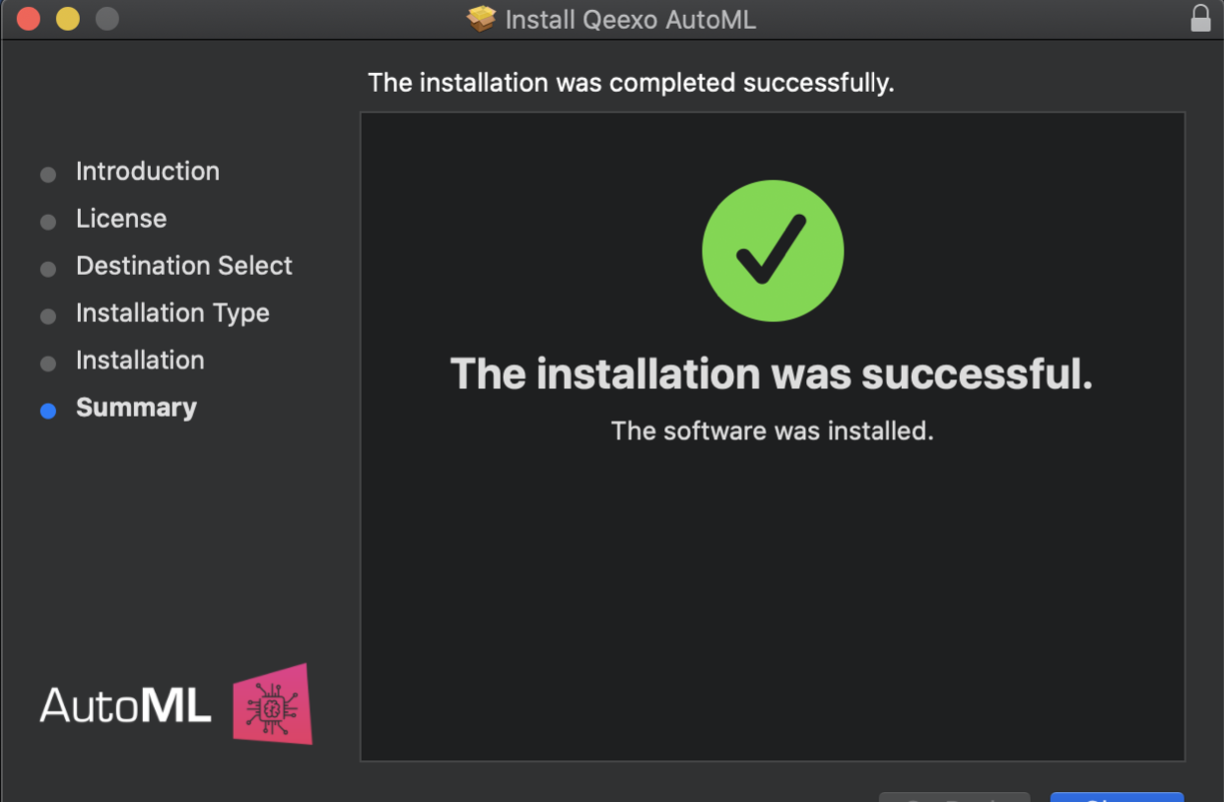
5. After installation, click Close to finish.
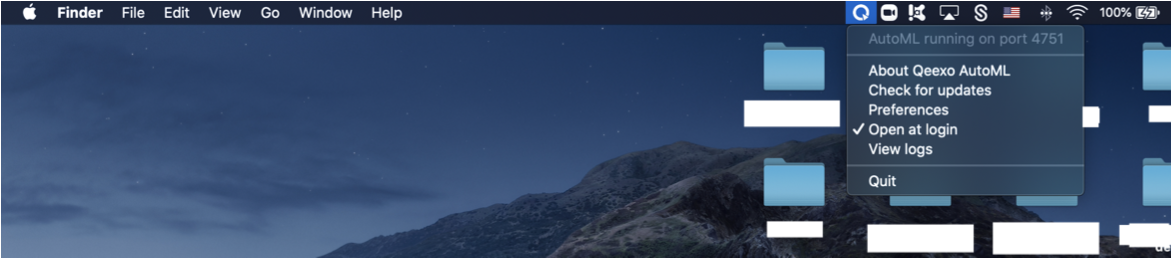
6. Now you should see AutoML application by clicking Launchpad on your laptop. Or you can find it from your laptop’s Applications folder. Once you see the icon (shown as below), click it to run it. Then you should see Qeexo AutoML application running on the menu bar.
- This should run automatically after install.
Setup STMicro STWIN Sense on MacOS
1. Unbox the STWINKT1B (part A). On the back of the board, plug in the battery cable (part D). You should hear a small click as it snaps into place.
*Connecting the battery is recommended but optional, as the STWINKT1B can be powered via USB while connecting to your machine (laptop).
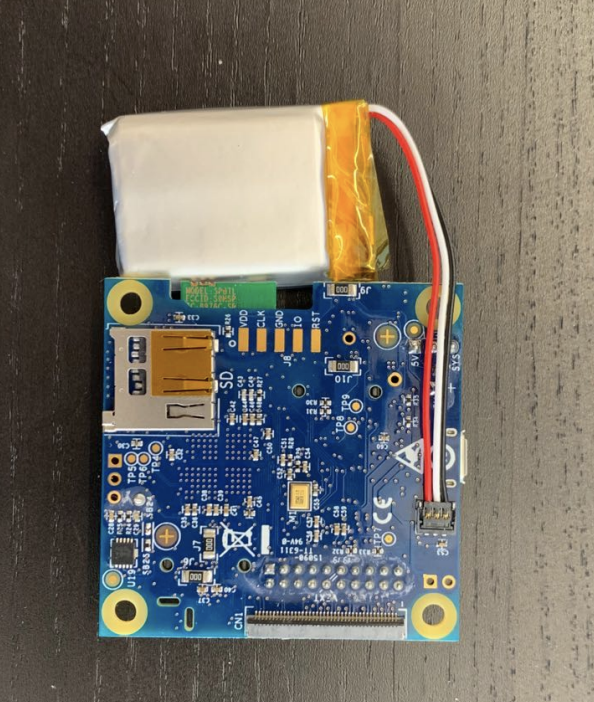
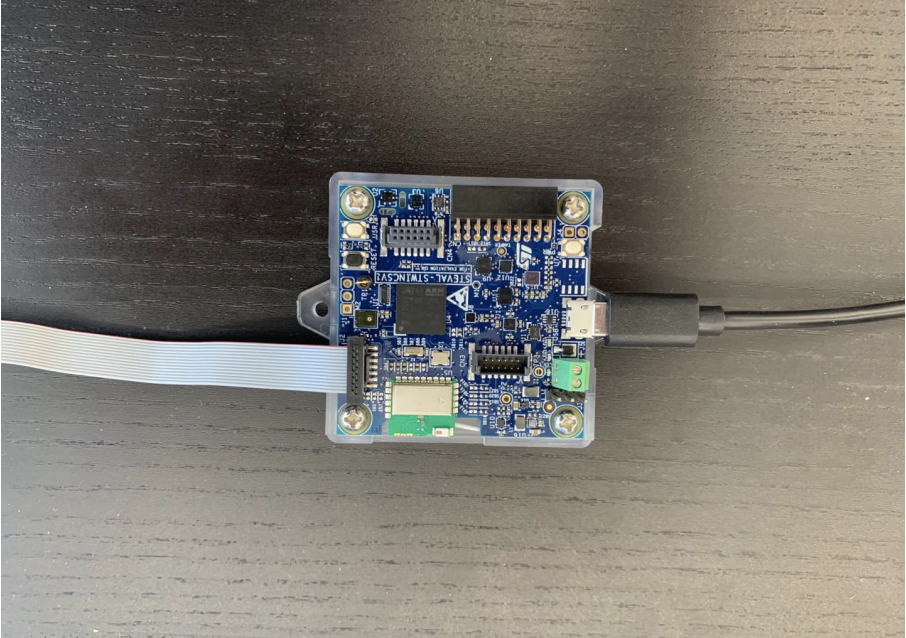
2. Screw the STWINKT1B board onto the blue plastic case (part E). The final setup should look similar to the picture shows below.
3. Connect sensor module
*Note: this process is only necessary for first time set up
a. Connect one end of the micro-USB cable to laptop first. DO NOT CONNECT the cable to STWINKT1B yet.
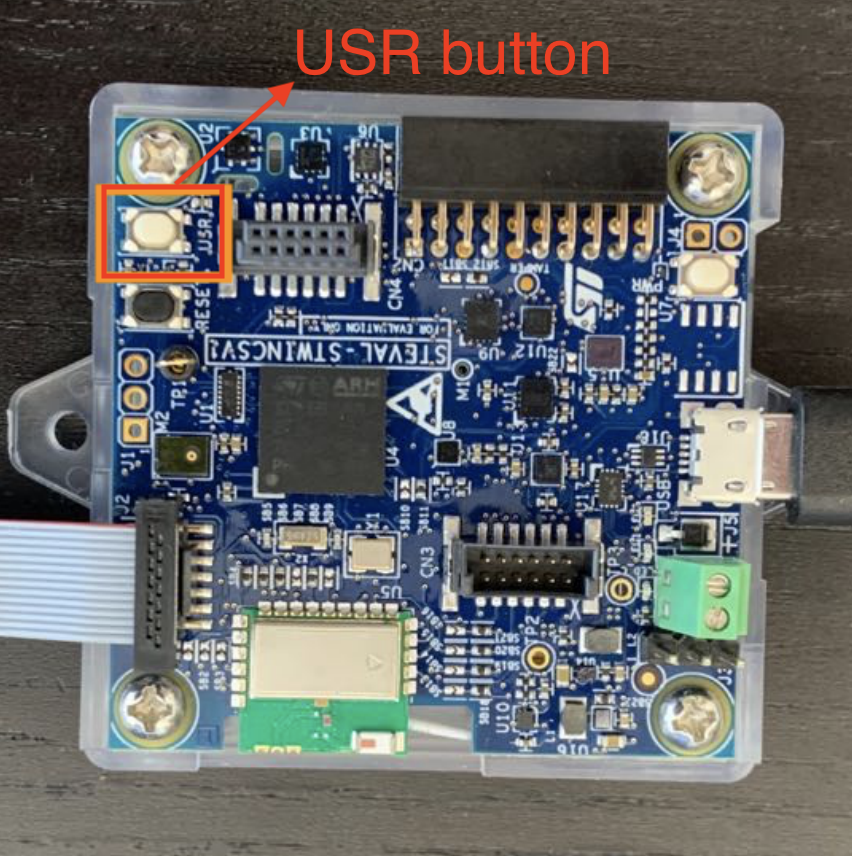
b. Locate and hold the USR button on the STWINKT1B. While holding the USR button, connect STWINKT1B to the other end of the micro-USB cable.
c. A red LED on STWINKT1B should blink when the device is connected to your laptop. It indicates the device is powered and in normal status.
Your device now is ready to flash in Qeexo AutoML
Run Qeexo AutoML
Open your browser, navigate to Qeexo AutoML and log in with your Qeexo AutoML account. Then you can start building your Machine Learning project in Qeexo AutoML.
Installation on Windows
Prerequisites
STWIN Starter Kit with the following components:
STWINKT1B (A)
STLINK-V3MINI (B)
Programming cable (14-pin) (C)
Battery (D)
Blue plastic case and four pairs of screws and nuts (E)
A micro-USB cable to connect the sensor module to your laptop
Download and install Qeexo AutoML on Windows
If you have previously downloaded and installed Qeexo AutoML application on your laptop, and it is the most updated version, please skip this section and jump to Setup STMicro STWIN Sense on Windows section.
Please keep your Qeexo AutoML application up to date as Qeexo periodically release software updates to fix bugs, improve performance, or add features. You can either Update Qeexo AutoML Software automatically or manually.
1. Once you registered and logged into your Qeexo AutoML account through https://qeexo.com/ , Please visit this link, select Qeexo AutoML Software, then select Windows to download the latest installer.
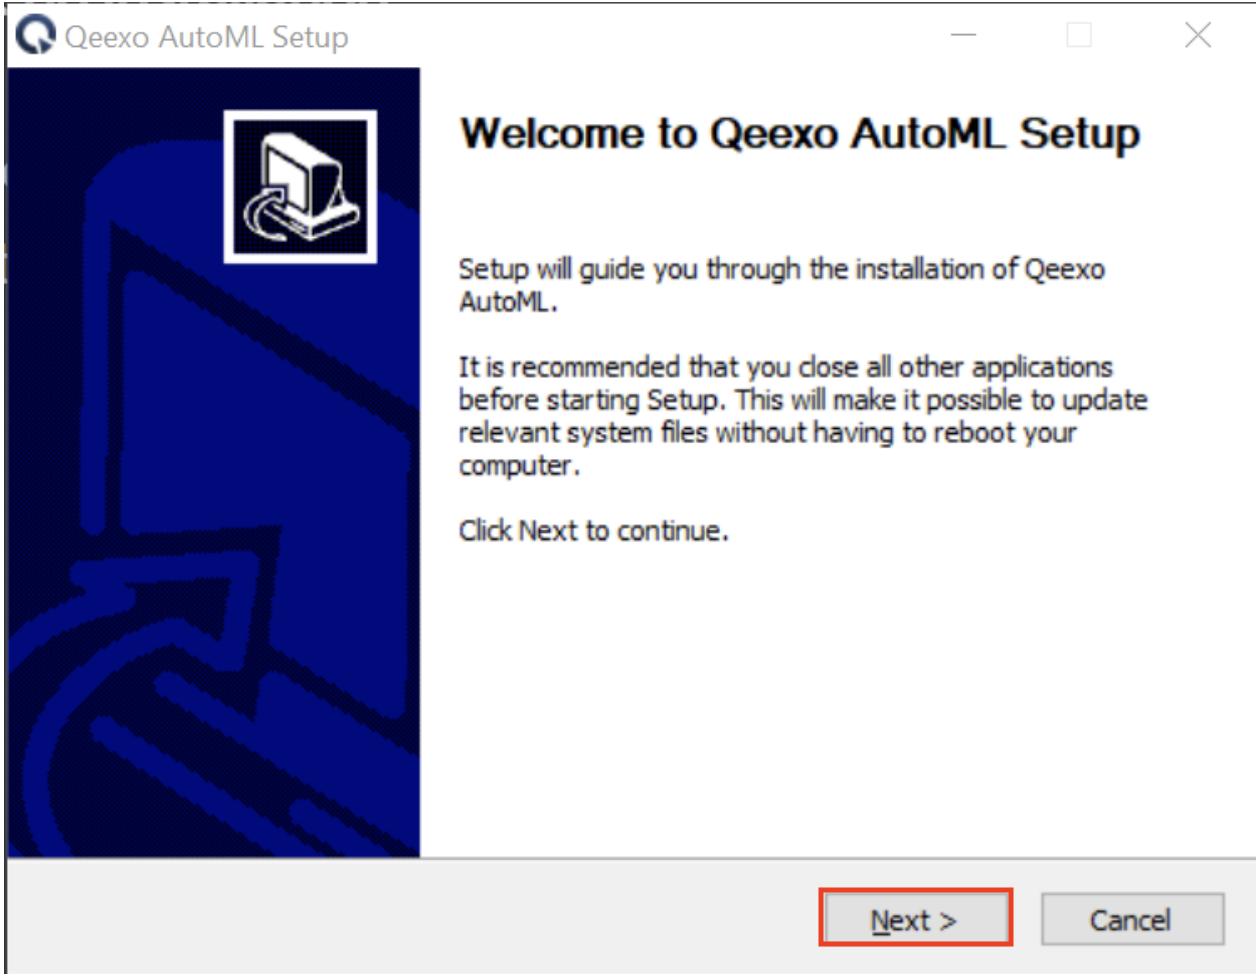
2. Once the installer - QeexoAutoML-installer-Windows.exe - is downloaded, double-click it to install it following steps below.
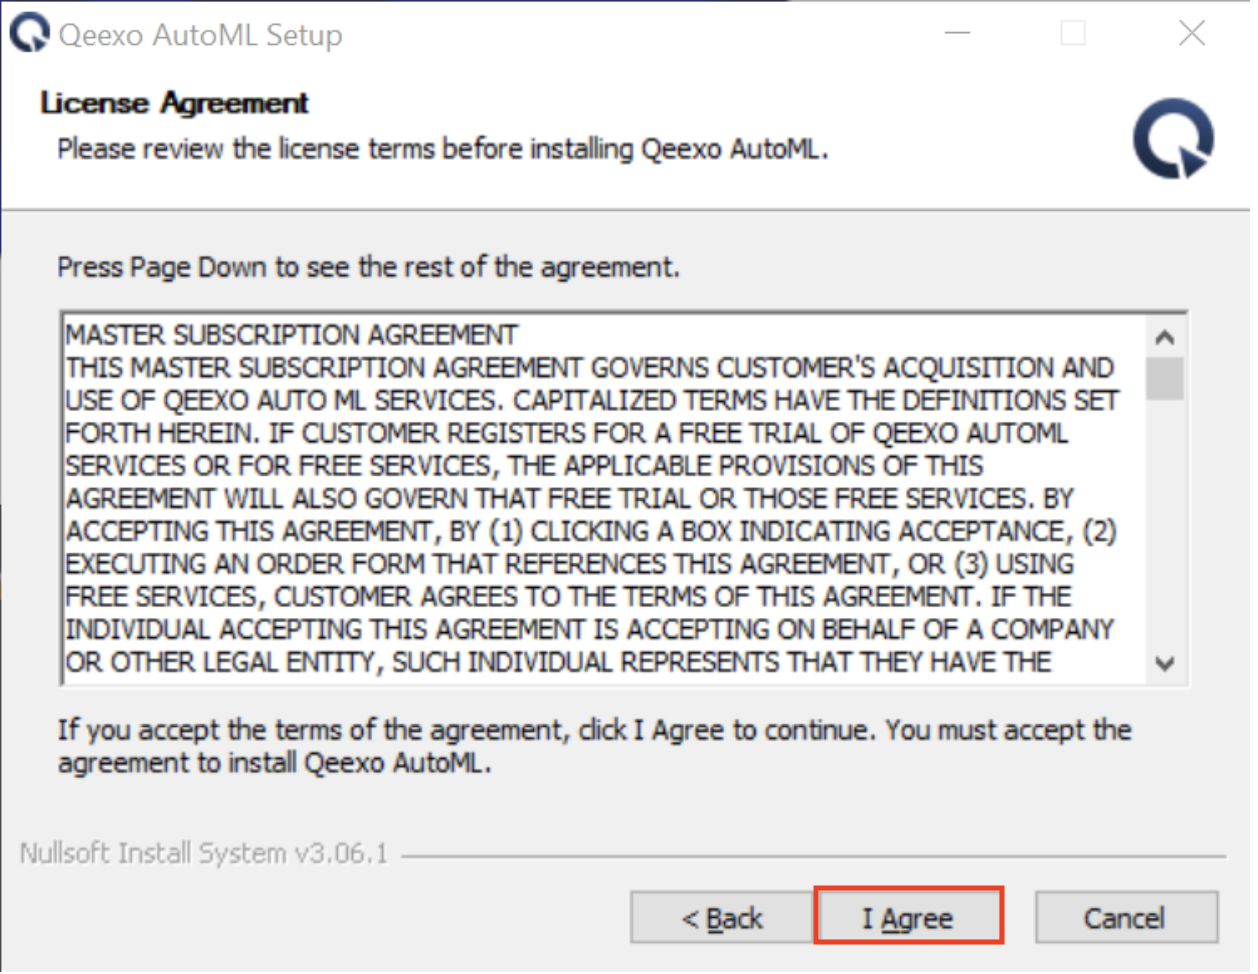
3. Welcome screen will be presented which begins the installation process. Click Next button to read the License Agreement. Then click I Agree to accept the agreement.
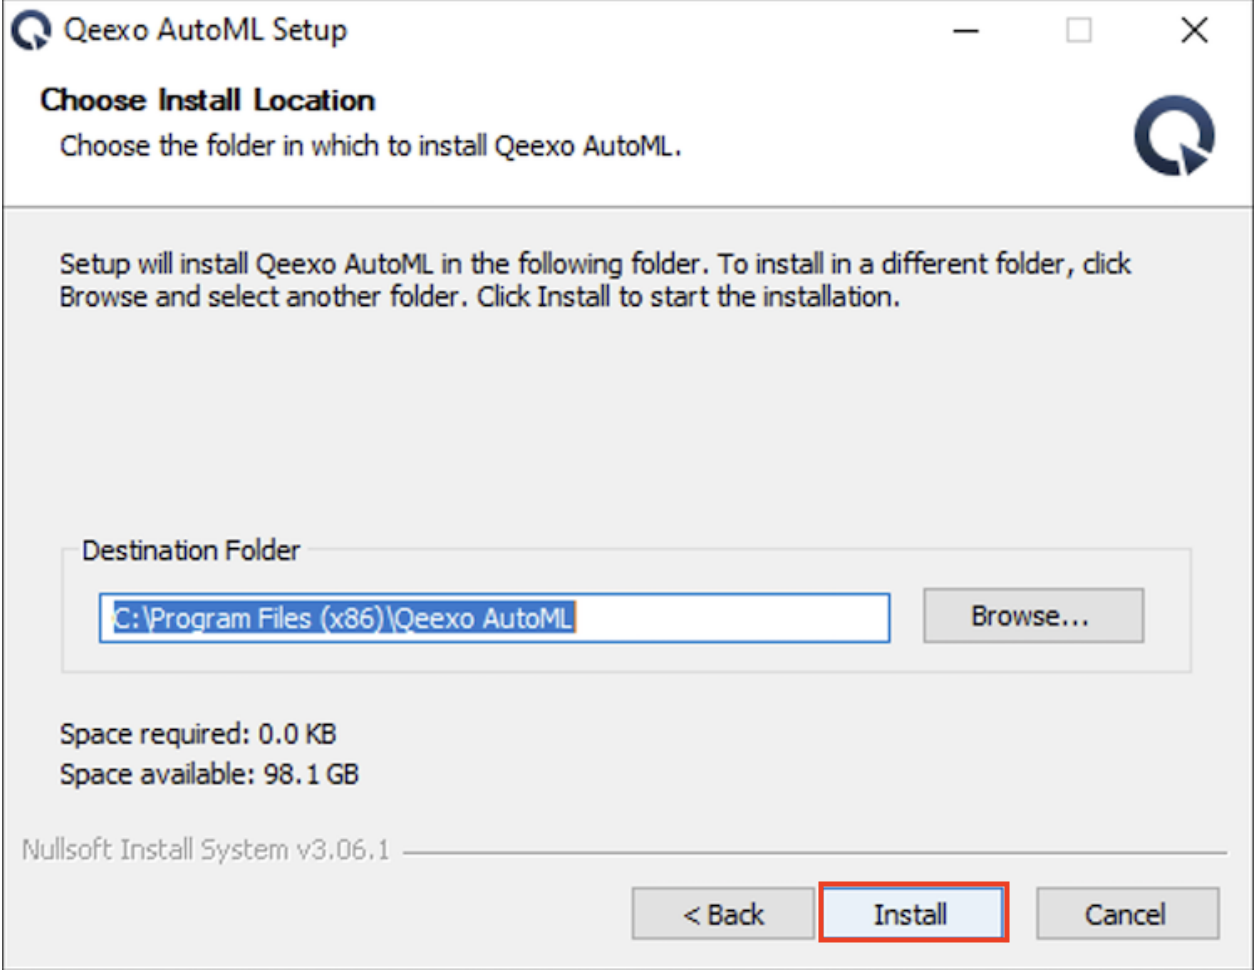
4. Click Install button to proceed next step. Note, we recommend to leave the Destination Folder as default path.
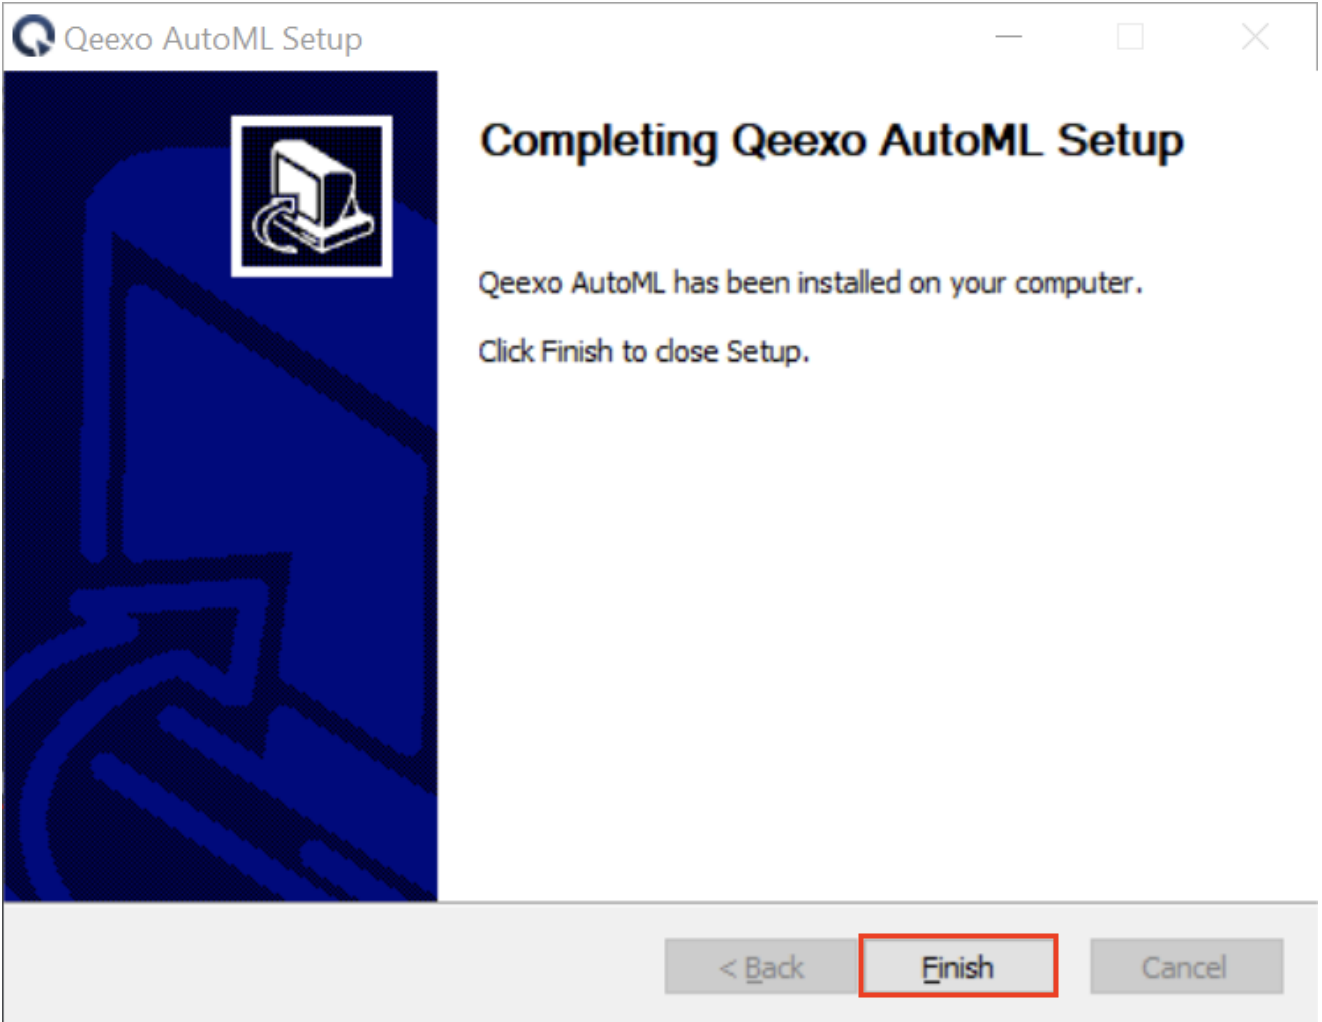
5. After installation, click Finish to close.
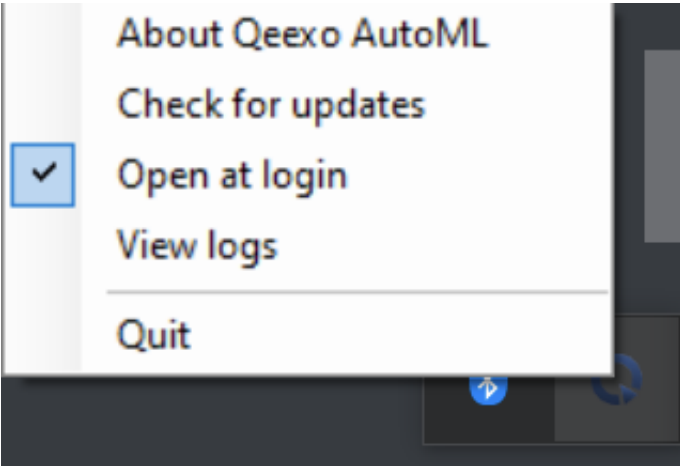
6. Now you should see Qeexo AutoML application running on the menu bar.
- This should run automatically after install.
Setup STMicro STWIN Sense on Windows
1. Prepare Hardware
a. Unbox the STWINKT1B (part A). On the back of the board, plug in the battery cable (part D). You should hear a small click as it snaps into place.
*Connecting the battery is recommended but optional, as the STWINKT1B can be powered via USB while connecting to your machine (laptop).
b. Screw the STWINKT1B board onto the blue plastic case (part E). The final setup should look similar to the picture shows below.
2. Update USB driver
a. Please visit this link to download Zadig.
b. Plugin STWIN board while holding down the USR button. A red LED on STWINKT1B should blink when the device is connected to your laptop. This indicates the device is powered and in normal status.
c. Let windows finish searching for drivers.
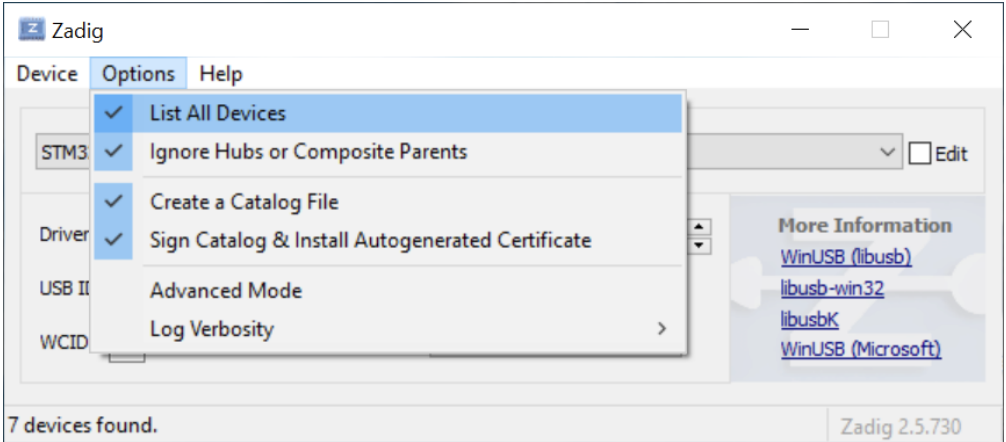
d. Start Zadig.
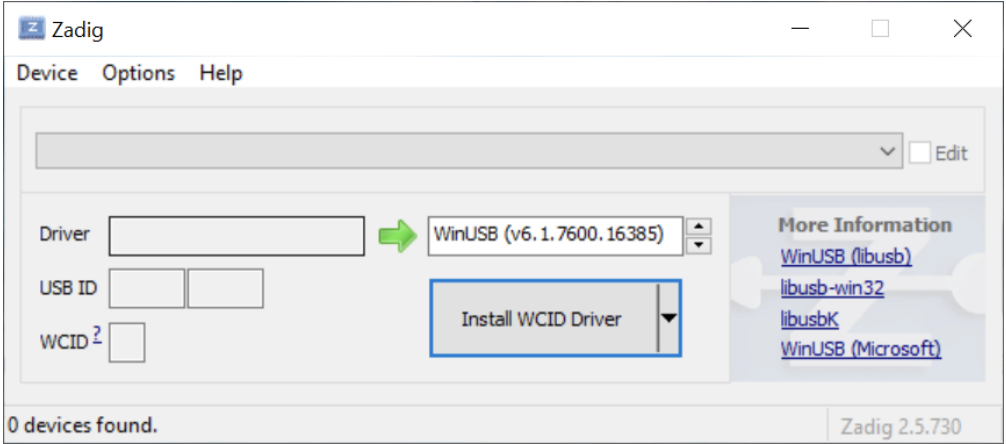
e. Selction “Option” → “List All Devices”.
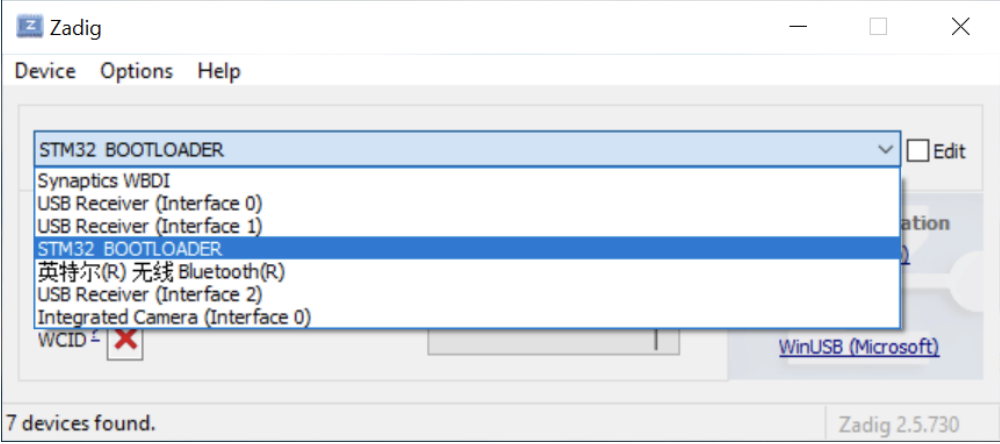
f. Select “STM32 BOOTLOADER" from the device dropdown.
*If "STM32 BOOTLOADER" is not available as a dropdown, ensure that the battery is disconnected from SensorTile.box and repeat step C.2. above (plugin USB cable while holding down "BOOT" button). If you need additional support, contact us by filling in this form.
g. Select "WinUSB (v6.1.7600.16385)" as new driver.
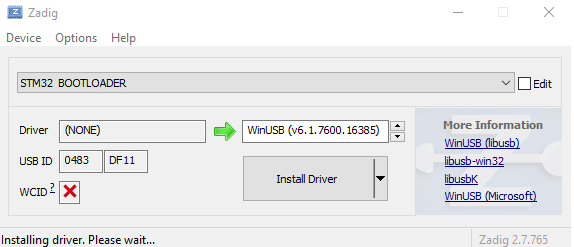
h. Click "Install Driver". After installation, You can see "The drive was installed successfully". Click "Close".
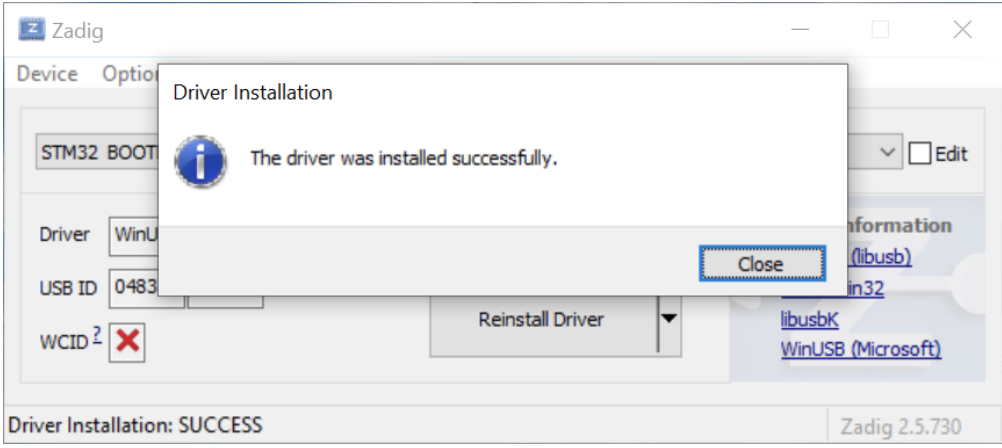
i. Please restart your laptop.
3. Connect sensor module
*Note: this process is only necessary for first time set up
a. Connect one end of the micro-USB cable to laptop first. DO NOT CONNECT the cable to STWINKT1B yet.
b. Locate and hold the USR button on the STWINKT1B. While holding the USR button, connect STWINKT1B to the other end of the micro-USB cable.
c. A red LED on STWINKT1B should blink when the device is connected to your laptop. It indicates the device is powered and in normal status.
Your device now is ready to flash in Qeexo AutoML
Run Qeexo AutoML
Open your browser, navigate to Qeexo AutoML and log in with your Qeexo AutoML account. Then you can start building your Machine Learning project in Qeexo AutoML.
Next steps
Now you can work on building projects on your Qeexo AutoML platform.